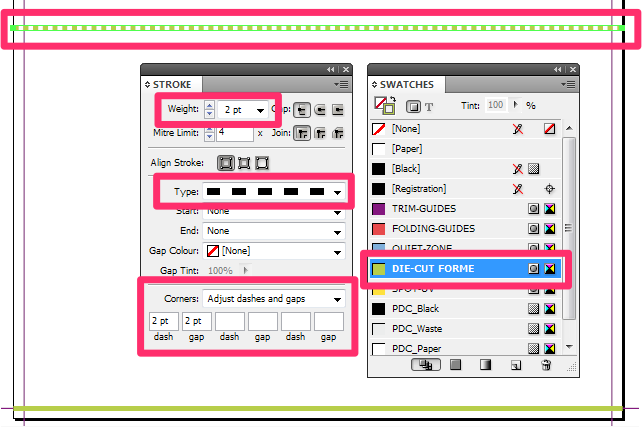
All die-cut lines are:
- 2pt Strokes set with the supplied DIE-CUT FORME spot colour;
- Set to Overprint.
Cuts & Creases:
- Cuts are continuous lines;
- Creases have a 2pt Dash and a 2pt Gap.
Jump To:
Creating the die-cut colour swatch
All of our InDesign templates include specific colour swatches for all finishing options or you can use the instructions below to create the spot colour yourself:
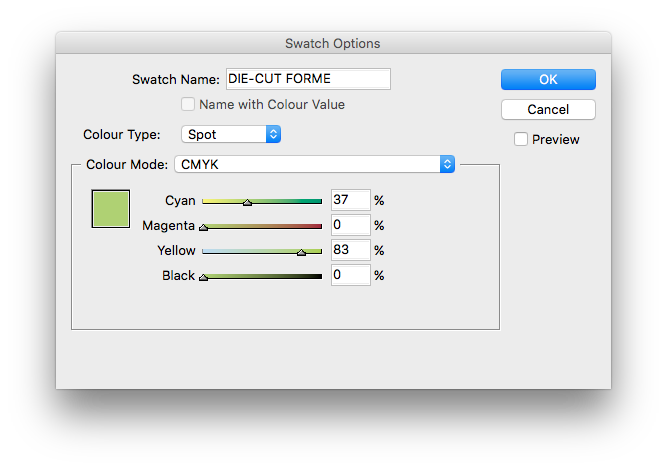
- Swatch name: DIE-CUT FORME (must be exact)
- Colour Type: Spot
- Colour Mode: CMYK
- Colour Make-up: 37.1% Cyan and 82.59% Yellow
- Set elements to Overprint ()
Provide Die-cut lines on all die-cut 'Creased, Shaped, Perforated or Cut-out' products
These include Greeting Cards, Folders, Laser Mailers, Thick Flyers with an added crease, and any other items which are cut-out, creased or perforated.
You should not include a die-cut forme guide for products which are folded such as Folded Leaflets and Folded 280gsm Flyers.
How to add a die cutting guide to your artwork
-
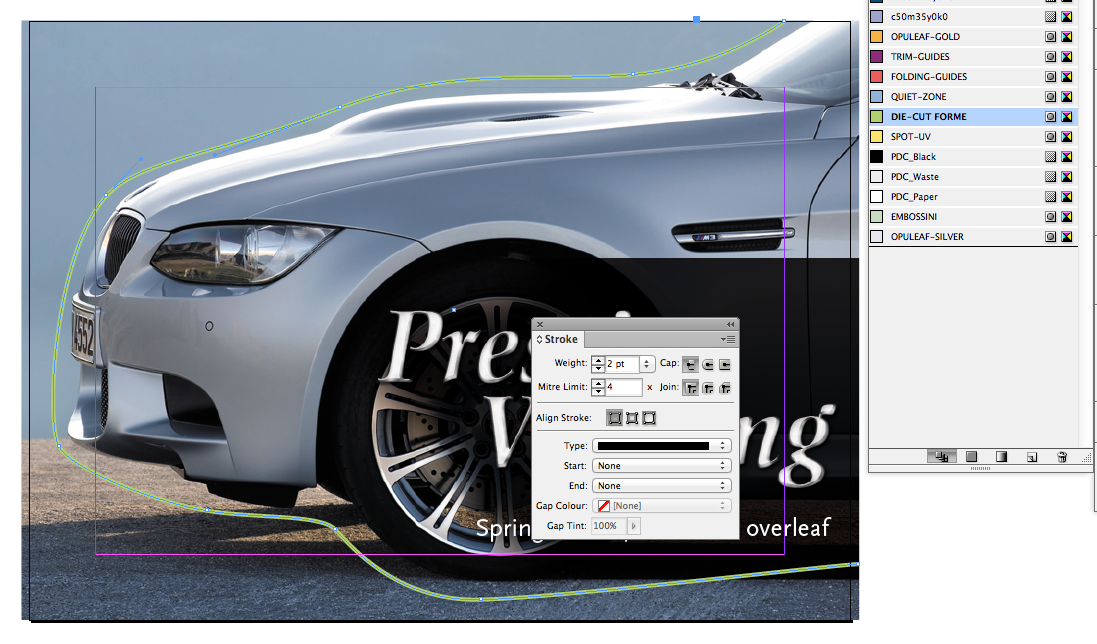
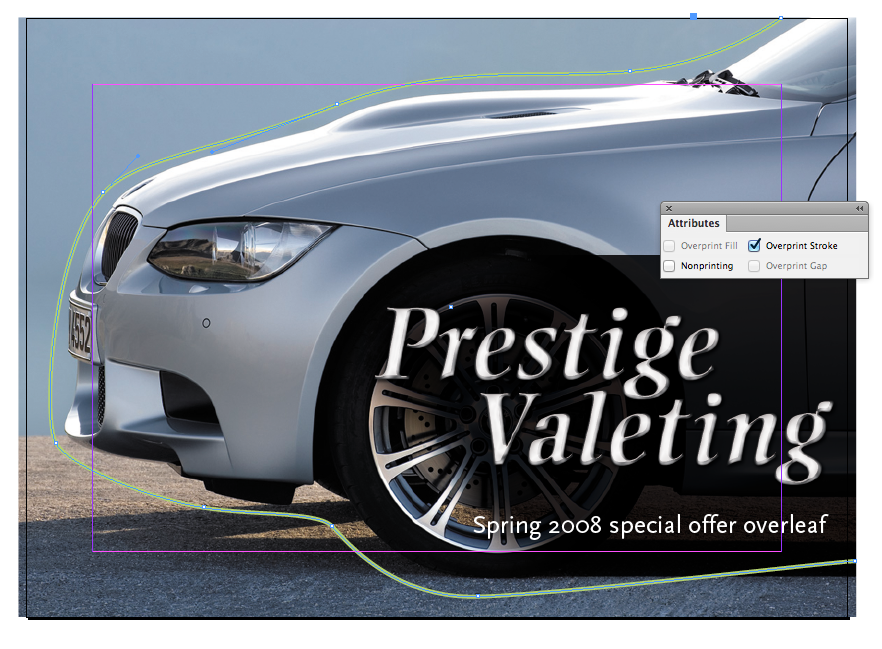
Place your Die Cut lines above your artwork using the special DIE-CUT FORME spot colour swatch. This swatch must remain as a spot colour and must not be adjusted in any way. The lines must be a 2pt stroke width.
-
Set the DIE-CUT FORME elements to Overprint from within your design application.
-
Die cutting is suitable for simple shapes only.
-
Only place Die Cut lines on the front page of your artwork.
-
Place Die Cut lines above Spot UV elements on the topmost layer of your artwork, usually the Finishing Layer on our templates.
Stroke Styles
The different Cut and Perforation types are denoted by line style, shown in the table below. The Finished appearance is how they appear on Paper.
A Crease is created in InDesign using a 2pt stroke, 2pt dash and a 2pt gap.
A Cut is created using a 2pt stroke and a Solid line.
Example:
Stroke Guidance
| Feature |
Finished appearance |
Stroke style |
| Cut |

Continuous cut |

Solid line |
| Perforation 3/3 |

3 pt gap, 3 pt cut, … |

12pt dash, 2pt gap,
2pt dash, 2pt gap, … |
| Perforation 2/10 |

2 pt gap, 10 pt cut, …
|

2pt dash, 2pt gap,
2pt dash, 6pt gap, …
|
| Perforation 2/35 |

2 pt gap, 35 pt cut, …
|

12pt dash, 4pt gap,
2pt dash, 4pt gap,
2pt dash, 4pt gap, … |
| Perforation 2/70 |

2 pt gap, 70 pt cut, …
|

4pt dash, 4pt gap, …
|
| Crease |
Continuous crease |

2pt dash, 2pt gap, ... |
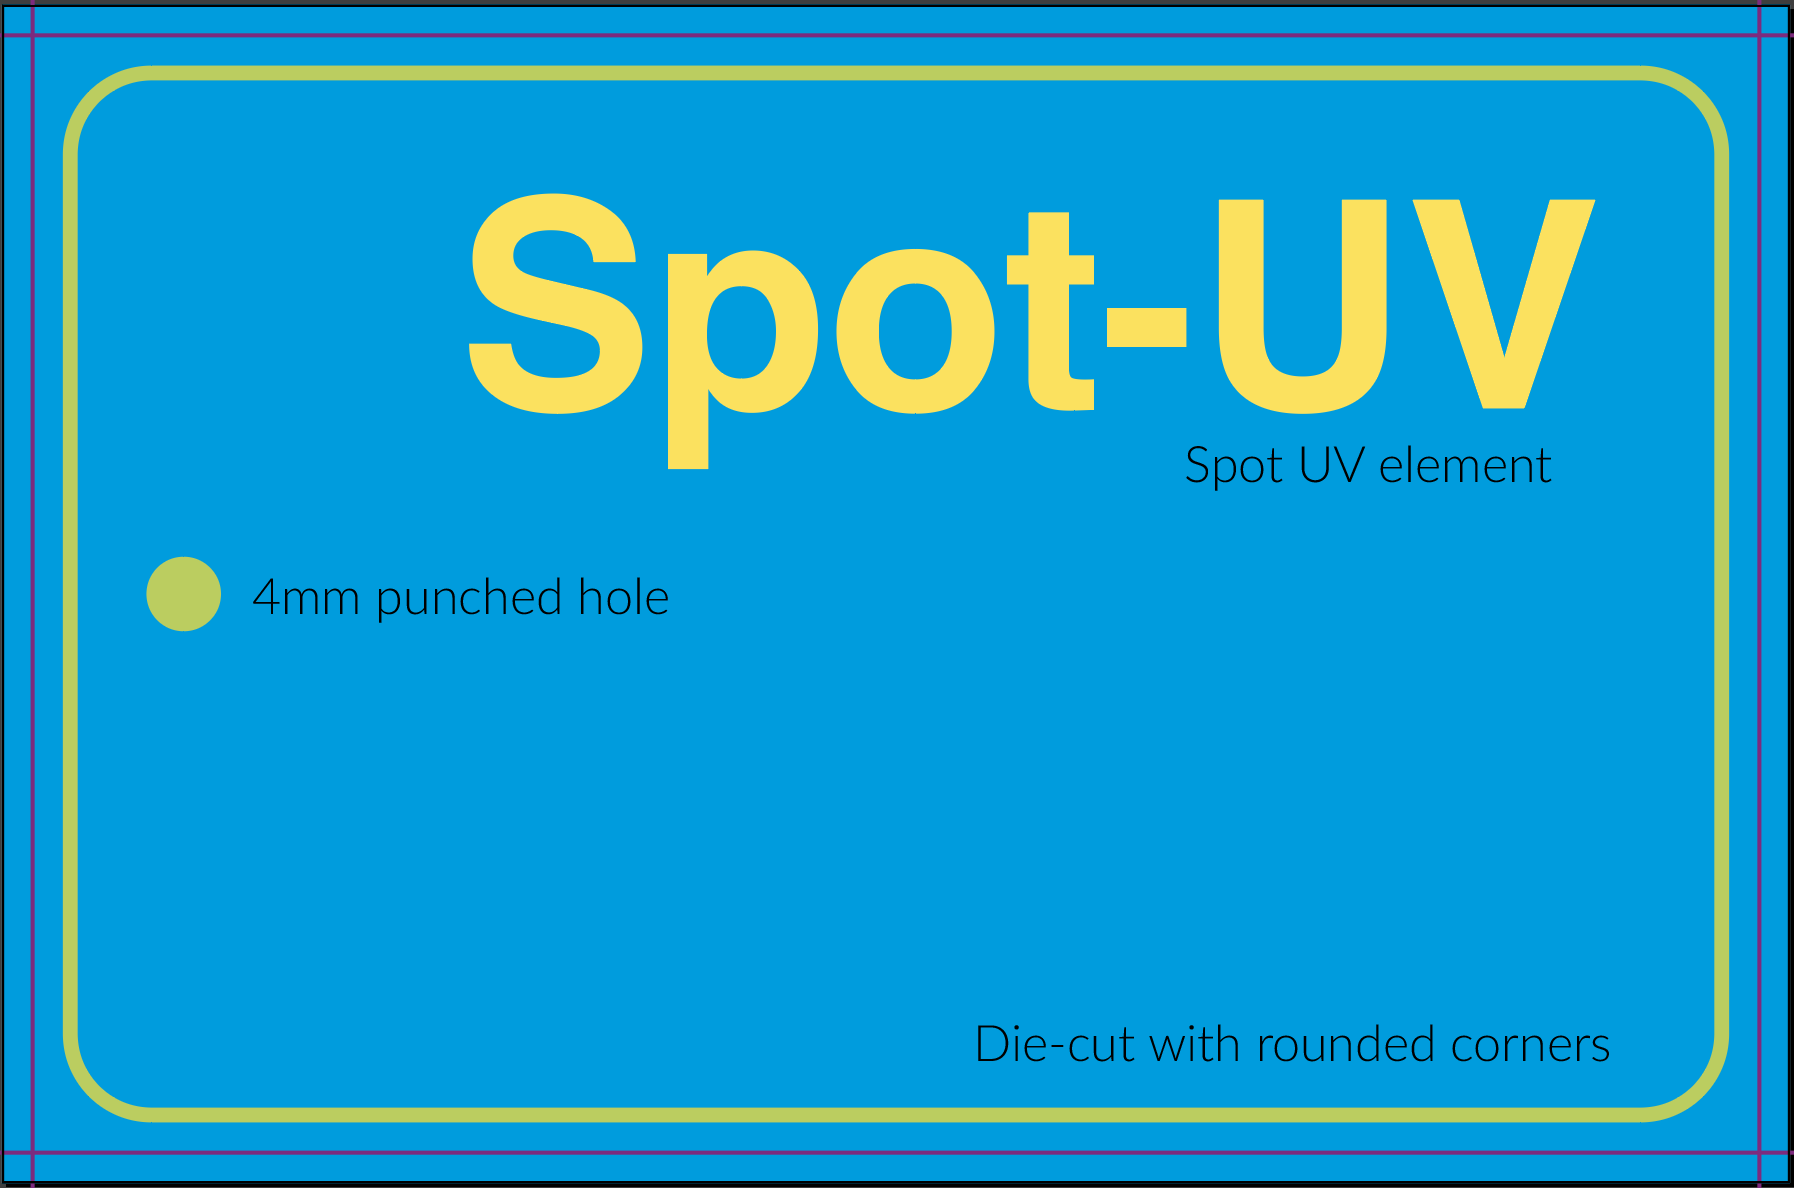
| Punched hole |
Available as: 3 mm – 10 mm in increments of 1 mm. |
Fill Colour: DIE-CUT FORME, overprinted.
Diameter: 3 mm – 10 mm. |
Perforation 3/3 is the strongest perforation recommended for Tear-off panels.
Perforation 2/70 is the weakest perforation recommended for Push-Out Shapes on Laminated 400gsm products.
Guidance for Suitability
Cuts are often used for Business Cards with an added shape or to create shaped flyer products.
Cuts can be used as either straight lines or shaped lines wherever you want to cut the finished product.
Production will assume that you want any cut-out shape to ‘fall out’ (without pushing) and will apply the minimum number of nicks required to allow them to manufacture and pack the product.
If you wish us to remove the waste from the edge of a shape, then specify the appropriate "push-out" Finishing option on the Job Summary. See Die-cut: Push-out and Waste for more information.
Business Cards and Flyers with Rounded Corners
If your Business Card or Flyer (A5 and below) requires all 4 corners to be rounded, then there is no need to order a Die Cut product. Instead order the normal product and specify a Finishing Note. The Finishing Note is:
• RO4CO Round off 4 corners
This Finishing Note adds an extra step into production, where the corners are rounded with a 6mm radius before packing. This step avoids the 'nicks' that have to be added when using a die cut to create the rounded corners. You can continue to order using a die cut product, but the new Finishing Note gives a superior end product.
Perforations
Are used for Tear-off panels, Push-out shapes and Pop-outs. There are some combinations you should avoid, and tricks for getting good results in some cases. Check out our Making it work article.
Perforation 3/3
This is the strongest perforation available.
Perforation 2/10
This is a strong mid-range perforation.
Not recommended for
-
Push-Out Shapes on 400gsm stocks.
The perforations are too strong and numerous for pushing-out without damaging the host.
-
Tear-Off Panels on any stock.
The perforation is weaker than the 3/3 and will break off easily.
Perforation 2/35
This is the weaker mid-range perforation available.
Perforation 2/70
This is the weakest perforation available.
Creases
A crease is used to prevent the fibres of the paper from cracking when folding. It also aids forming a neat fold in thicker materials. It will not automatically fold in exactly the right place. The more care you take with folding, the better the result you will obtain.
Punched Holes
Punched holes are available with diameter 2½ mm, and in increments of 1 mm, from 3 mm up to 10 mm.
Punched holes remain attached to the item
Although the holes are fully punched through, they remain attached to the item, and will require pushing out by the customer or end user.
If you require a fully drilled hole (4 mm, 5 mm, ... 10 mm), specify drilling instead.
Specifying drilling will add a day to the turnaround of your product. We recommend using punches wherever possible.
Complexity
Each punched hole contributes '2' to the complexity total, so take care not to exceed the complexity score allowed for the product. See Forme complexity for more.

 Print this page